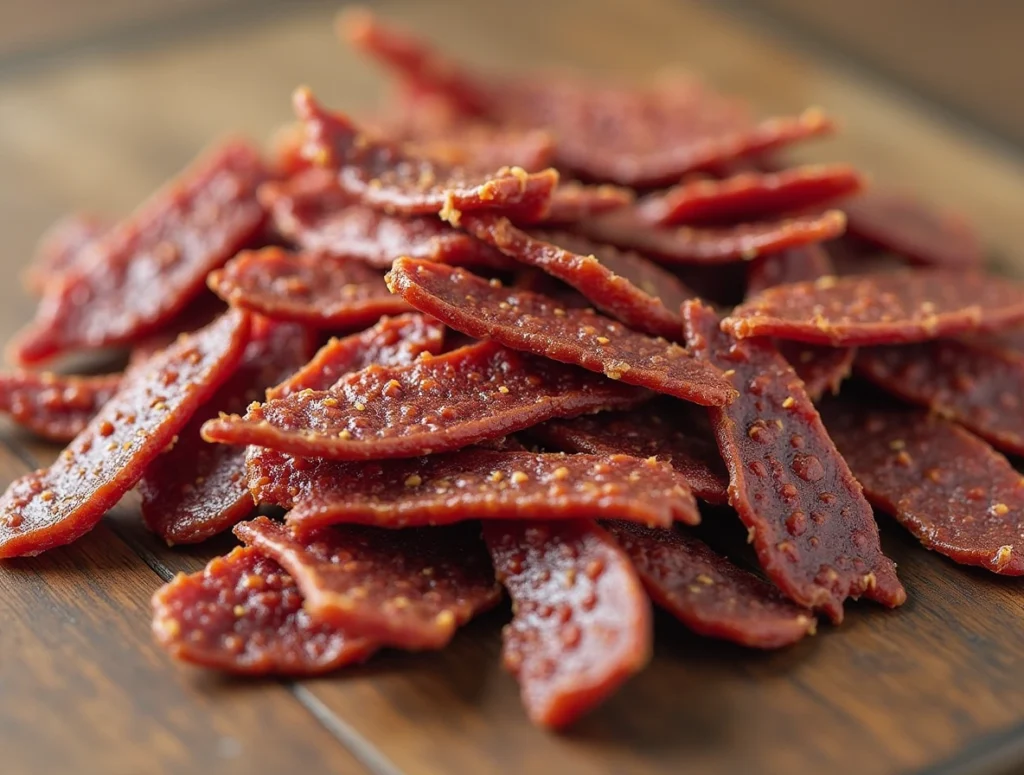
The Ultimate Hamburger Jerky Recipe: A Step-by-Step Guide for Delicious Homemade Beef Jerky
Are you looking to transform ordinary ground beef into a delicious, protein-packed snack that lasts for weeks? Look no further! As a chef with nearly three decades of experience, I’m excited to share my foolproof hamburger jerky recipe that’s become a fan favorite on my culinary journey.
In this comprehensive guide, we’ll explore everything you need to know about making incredible hamburger jerky at home—whether you’re using a dehydrator, oven, or smoker. I’ll walk you through selecting the perfect meat, creating flavorful marinades, and mastering the drying techniques that deliver the chewy yet tender texture every jerky enthusiast craves.
Why Make Your Hamburger Jerky Recipe?
Store-bought jerky is convenient but often has a hefty price tag and questionable ingredients. Making hamburger jerky at home allows you to:
- Control the quality of meat (lean ground beef is ideal)
- Customize flavors to your exact preference
- Significantly reduce costs (often 50-70% cheaper than store-bought)
- Create healthier snacks with lower sodium and no preservatives
- Experience the satisfaction of crafting your artisanal protein snack
As someone who’s perfected this recipe for years, I can assure you that once you try homemade hamburger jerky, you’ll never want to go back to the commercial stuff!
Understanding the Basics: Ground Beef vs. Whole Muscle Jerky
Before diving into our recipe, let’s understand what makes hamburger jerky (made from ground beef) different from traditional jerky (made from whole muscle cuts):
Hamburger Jerky Recipe Advantages:
- More accessible: Ground beef is typically more affordable than premium cuts
- Greater flavor absorption: The increased surface area absorbs marinades more effectively
- Easier to chew: Perfect for those who find traditional jerky too tough
- Customizable texture: Can be made more or less dense depending on preference
- Versatile seasoning options: Takes on flavors more readily than whole muscle
One common challenge with ground beef jerky is maintaining the right texture without becoming too crumbly. Don’t worry—my recipe includes special techniques to ensure perfect consistency every time.
Selecting the Right Meat for Your Hamburger Jerky Recipe
The foundation of great hamburger jerky starts with the proper meat selection. For optimal results:
Choose the Right Fat Content
The most critical factor in successful hamburger jerky is using lean ground beef. I recommend:
- 90/10 or 93/7 lean-to-fat ratio: Higher fat content creates jerky that spoils faster
- Freshly ground meat: For best flavor and food safety
- Grass-fed meat (optional): For enhanced flavor profile and nutritional benefits
If your ground beef has a higher fat content, you can reduce it by:
- Cooking the meat lightly and draining excess fat
- Rinsing with hot water after cooking
- Patting dry with paper towels before seasoning
Remember: Fat is the enemy of preservation. The leaner your meat, the longer your jerky will last!
Essential Equipment for Making Hamburger Jerky Recipe
To create perfect hamburger jerky, you’ll need some basic equipment:
Must-Have Tools:
- Jerky gun/press (strongly recommended for ground beef jerky)
- Mixing bowl (large enough for thoroughly mixing meat and seasonings)
- Measuring spoons (for precise seasoning)
- Non-stick spray (for dehydrator trays or oven racks)
- Paper towels (for blotting excess moisture)
- Airtight storage containers (for storing finished jerky)
Drying Equipment (choose one):
- Food dehydrator (ideal for consistent results)
- Oven with baking sheets (most accessible option)
- Smoker (for additional flavor dimension)
While a jerky gun isn’t necessary, it dramatically improves the consistency and appearance of your hamburger jerky. It extrudes the seasoned meat into uniform strips that dry evenly and look professional.
The Ultimate Hamburger Jerky Recipe (Base Recipe)
Now, let’s get to the main event—my tried-and-true hamburger jerky recipe that is an excellent foundation for endless variations.
Ingredients:
- 2 pounds lean ground beef (90/10 or leaner)
- 1/4 cup soy sauce (low sodium preferred)
- 2 tablespoons Worcestershire sauce
- 2 teaspoons smoked paprika
- 2 teaspoons black pepper
- 1 teaspoon garlic powder
- 1 teaspoon onion powder
- 1 teaspoon liquid smoke (optional, omit if using a smoker)
- 1 teaspoon sea salt
- 1/2 teaspoon curing salt (Prague Powder #1) (optional but recommended for food safety)
- 1/2 teaspoon red pepper flakes (adjust for desired heat)
- 1 tablespoon brown sugar
Step-by-Step Preparation:
- Prepare the meat: If using higher-fat ground beef, cook it lightly to render some fat, drain thoroughly, and allow it to cool.
- Mix the marinade: Combine all ingredients except the meat in a large bowl. Whisk until thoroughly mixed.
- Combine meat and marinade: Add the ground beef to the marinade mixture. Using clean hands, mix thoroughly until all seasonings are evenly distributed throughout the meat. Work the mixture for at least 5 minutes to develop a tacky texture.
- Rest and develop flavor: Cover the bowl with plastic wrap and refrigerate for at least 4 hours, preferably overnight. This resting period allows flavors to penetrate throughout the meat mixture.
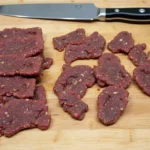
- Prepare for drying: Remove the meat mixture from the refrigerator and load it into your jerky gun. If you don’t have a jerky gun, you can form the mixture into thin patties by hand.
- Form the strips: Extrude the meat mixture onto dehydrator trays, lined baking sheets, or smoker racks in uniform strips about 1/4 inch thick and 4-6 inches long. Leave small spaces between strips to ensure proper air circulation.
- Blot excess moisture: Before drying, gently pat the strips with paper towels to remove any surface moisture, which will help them dry more efficiently.
Now, let’s look at the different methods for drying your hamburger jerky.
Ground Beef Jerky Dehydrator Recipe
A dehydrator provides the most consistent results for homemade jerky. Here’s how to perfect the drying process:
- Preheat your dehydrator to 160°F (71°C).
- Arrange prepared strips on dehydrator trays, ensuring they don’t touch.
- Begin the drying process: Initially dehydrate at 160°F for the first hour (this helps with food safety).
- Reduce temperature: After the first hour, reduce to 145°F (63°C) and continue drying for 4-6 hours.
- Check for doneness: Proper jerky should crack but not break when bent. If it’s still too moist in the center, continue drying in 30-minute increments.
Pro Tip: Rotate your dehydrator trays every 2 hours to ensure even drying, as most dehydrators have temperature variations between the top and bottom trays.
Ground Beef Jerky Oven Recipe
Don’t have a dehydrator? No problem! Your oven works wonderfully for making jerky:
- Preheat your oven to its lowest setting, ideally 170°F (77°C) or lower. If your oven doesn’t go this low, keep the door slightly ajar using a wooden spoon to maintain a lower temperature.
- Prepare baking sheets by lining them with foil and placing a wire rack on top. Spray the rack with non-stick spray.
- Arrange meat strips on the wire racks, ensuring they don’t touch.
- Place in oven: Put the baking sheets in the center of the oven. Place another baking sheet on the bottom rack to catch any drippings.
- Dry with the door ajar: If your oven can’t go below 170°F, keep the door slightly open to prevent cooking rather than dehydrating the meat.
- Monitor closely: Oven drying typically takes 3-5 hours. Check after 3 hours and then every 30 minutes thereafter.
- Test for doneness: Remove a piece, let it cool, and perform the bend test. It should bend without breaking but have a firm texture.
Important Safety Note: When making jerky in an oven, it’s extra important to use curing salt (Prague Powder #1) in your recipe, as oven temperatures can sometimes be inconsistent for food safety.
Ground Beef Jerky Smoker Recipe
For those with a smoker, you can create incredibly flavorful hamburger jerky with a genuine smoke ring and authentic flavor:
- Preheat your smoker to 160-180°F (71-82°C).
- Choose your wood chips: Hickory, mesquite, apple, or cherry all work well with beef. For milder smoke flavor, use fruit woods like apple or cherry.
- Prepare smoker racks by spraying them with non-stick spray.
- Arrange meat strips on smoker racks with small spaces between them.
- Smoke the jerky: Maintain the 160-180°F temperature range throughout the process, adding wood chips to maintain smoke production.
- Monitor the process: Smoking typically takes 4-6 hours. Check after 3 hours and then every 30 minutes.
- Test for doneness: The jerky should be firm, dark in color, and pass the bend test.
Smoker Pro Tip: When using a smoker, you can reduce or eliminate the liquid smoke in the original recipe, as you’ll get the natural smoke flavor from the process.
How to Tell When Your Hamburger Jerky Recipe is Done
Regardless of your drying method, knowing when jerky is properly done is crucial:
The Perfect Jerky Test:
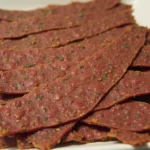
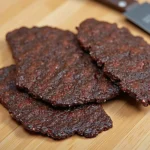
- Visual inspection: Jerky should be much darker than raw meat, appearing deep reddish-brown to almost black in some spots.
- Touch test: It should feel dry and firm, not spongy or soft.
- Bend test: Properly dried jerky should crack slightly but not break apart completely when bent. If white fibers appear when bending (similar to a chicken breast), it’s properly done.
- Moisture check: No moisture should come out when you squeeze the jerky.
Remember that jerky will firm up slightly as it cools, so it’s better to err on the side of slightly less dry than too brittle.
Flavor Variations: Taking Your Hamburger Jerky Recipe to the Next Level
One of the joys of making homemade jerky is experimenting with different flavor profiles. Here are some of my favorite variations:
Sweet & Spicy Hamburger Jerky Recipe
- Add three tablespoons honey
- Increase red pepper flakes to 1 tablespoon
- Add one teaspoon of cayenne pepper
Teriyaki Hamburger Jerky Recipe
- Replace soy sauce with 1/3 cup teriyaki sauce
- Add two tablespoons brown sugar
- Add one teaspoon fresh grated ginger
- Add one tablespoon pineapple juice
Steakhouse Hamburger Jerky Recipe
- Add one tablespoon of Montreal steak seasoning
- Increase black pepper to 1 tablespoon
- Add one teaspoon dried rosemary, crushed
BBQ Hamburger Jerky Recipe
- Add three tablespoons BBQ sauce
- Add one teaspoon liquid smoke
- Add one tablespoon brown sugar
- Add 1/2 teaspoon cumin
Don’t be afraid to experiment with your favorite spice blends and sauces. The ground beef format absorbs flavors beautifully, making it ideal for creative flavor combinations!
Proper Storage for Maximum Shelf Life
After investing time in making perfect hamburger jerky, proper storage ensures it stays delicious:
Immediate Cooling:
- Once done drying, allow the jerky to cool completely at room temperature (1-2 hours).
- Blot any remaining oil spots with paper towels.
Storage Options:
Short-term storage (1-2 weeks):
- Store in a ziplock bag with excess air removed
- Keep at room temperature in a cool, dry place
Medium-term storage (up to 3 months):
- Store in airtight containers or vacuum-sealed bags
- Keep in a cool, dry place away from direct sunlight
Long-term storage (3+ months):
- Vacuum seal in portions
- Store in the refrigerator (3-6 months) or freezer (6+ months)
Pro Storage Tip: Add a food-grade desiccant packet to your storage container to absorb any remaining moisture and extend shelf life.
Standard Troubleshooting for Hamburger Jerky
Even experienced chefs encounter challenges. Here’s how to solve common hamburger jerky problems:
Too Crumbly
- Problem: Not enough binding in the meat mixture
- Solution: Work the meat mixture longer before forming; add one beaten egg white per pound of meat; or try using slightly less lean meat (85/15)
Too Tough
- Problem: Overdried or meat mixture worked too long
- Solution: Reduce drying time; don’t overwork meat; add 1-2 tablespoons of olive oil to the mixture
Mold Development
- Problem: Insufficient drying or improper storage
- Solution: Ensure jerky is thoroughly dried; use proper storage methods; consider adding curing salt
Uneven Drying
- Problem: Strips of inconsistent thickness
- Solution: Use a jerky gun for more uniform results; rotate trays during drying
Health Benefits of Homemade Hamburger Jerky
Beyond being delicious, homemade hamburger jerky offers impressive nutritional benefits:
- High protein: Approximately 7-9 grams of protein per ounce
- Low carbohydrate: Perfect for keto and low-carb diets
- Portable nutrition: Ideal for hikers, athletes, and busy professionals
- Controlled sodium: Much lower salt content than commercial brands
- No preservatives: Free from artificial additives when made at home
When made with lean beef, homemade jerky makes an excellent high-protein snack. Try using our calorie calculator to track your nutritional intake for an even healthier version.
Cost Analysis: Homemade vs. Store-Bought Jerky
Let’s break down the economics of making your hamburger jerky:
Cost Comparison:
- Store-bought beef jerky: $25-35 per pound
- Homemade hamburger jerky: $8-12 per pound
Average savings: Over 60% when making your own!
Consider that 2 pounds of raw ground beef yields approximately 0.75 pounds of finished jerky (due to moisture loss). You’re saving significantly compared to commercial jerky despite factoring in seasonings and electricity costs.
Quick Takeaways for Perfect Hamburger Jerky
Before wrapping up, here are the key points to remember:
- Always use lean ground beef (90/10 or leaner) for best results and longer shelf life
- Work the meat mixture thoroughly to develop proper binding
- Marinate for at least 4 hours, preferably overnight
- Use a jerky gun for consistent thickness and professional appearance
- Dry until jerky is firm but still pliable—not brittle
- Allow to cool completely before storage
- Store in airtight containers away from heat and sunlight
- Experiment with different flavors to find your signature jerky style
Conclusion: Your Journey to Hamburger Jerky Mastery
Crafting homemade hamburger jerky is both an art and a science that pays delicious dividends. The process might seem intimidating initially, but once you’ve made your first batch, you’ll wonder why you didn’t try it sooner.
You will save money, create healthier snacks, and gain a valuable culinary skill connecting you to food preservation traditions dating back centuries. There’s something deeply satisfying about transforming simple ground beef into protein-rich jerky that can fuel adventures or satisfy midday cravings.
I encourage you to start with the base recipe, master the technique, and let your creativity lead you to new flavor combinations. Before long, you’ll develop your signature hamburger jerky that friends and family will rave about!
Have you tried making hamburger jerky before? Do you have questions or tips you would like to share? I’d love to hear about your experiences in the comments below. And if you make this recipe, please share your results and any modifications you made!
For more delicious homemade recipes, check out my homemade cheeseburger guide or learn how to make sourdough hamburger buns for your next burger night.
Happy jerky-making!
Frequently Asked Questions About Hamburger Jerky
Is hamburger jerky safe to eat?
Yes, hamburger jerky is safe when properly prepared. Using lean meat, adding curing salt, and ensuring adequate drying temperatures (initial heat of 160°F) will eliminate potential bacteria. When made correctly, it’s just as safe as traditional whole-muscle jerky.
How long does homemade hamburger jerky last?
When properly dried and stored in airtight containers, homemade hamburger jerky typically lasts 1-2 weeks at room temperature, 3-6 months in the refrigerator, and 6+ months in the freezer. The leaner your meat, the longer it will last.
Can I make hamburger jerky without a dehydrator?
Absolutely! While dehydrators provide consistent results, you can make excellent hamburger jerky in a standard oven or smoker. Follow the oven method in this article, using your oven’s lowest setting with the door slightly ajar.
Is curing salt necessary for making hamburger jerky?
While not required, curing salt (Prague Powder #1) is strongly recommended for ground beef jerky as an added safety measure against bacteria. It also helps preserve color and extend shelf life. If omitting, be extra vigilant about drying temperatures and storage.
Can I use frozen ground beef to make jerky?
Yes, but thaw it completely in the refrigerator before use. Never use quick-thawing methods, as they can promote bacterial growth. For tips on working with frozen patties, see our guide on cooking frozen hamburger patties without thawing.
References
- National Center for Home Food Preservation. “Making Jerky at Home.” University of Georgia Extension.
- USDA Food Safety and Inspection Service. “Jerky and Food Safety.” United States Department of Agriculture.
- Marianski, Stanley, and Adam. “Home Production of Quality Meats and Sausages.” Bookmagic LLC.
- American Meat Science Association. “Recommendations for Safe Jerky Production.”
- McGee, Harold. “On Food and Cooking: The Science and Lore of the Kitchen.” Scribner.
This article was last updated on May 21, 2025, and reflects the most current food safety guidelines for home jerky production.
